(This post was last updated on: 2/16/23.) Learn how to make beef jerky at home!
What better snack food to make than homemade beef jerky? Seriously, it’s easy and cheap to make and if stored properly it can last for a long time. This is a survivalist’s dream food!
I will be showing you how to make jerky by using my Nesco dehydrator. I know you can do this in your oven or air fryer, but I have never tried that, so if you do not have a dehydrator at home, I suggest getting one on Amazon. They are not very expensive and there’s so much you can do with it; totally worth the money. It will make the task of making jerky or dried fruit at home so simple for you. Here’s what you need to know on how to make beef jerky at home.
Step 1: Pick your protein. For this post, I used one pound of deer meat that a friend had given to me. Usually I do not have that luxury. I typically will buy one pound of the leanest ground beef I can find. It has to be lean, preferably 97% lean. You can experiment with different types of ground meat like chicken or turkey. But I usually stick with beef.
Step 2: Get some seasoning and cure. Yes, you can make your own seasonings. I am sure Pinterest is full of recipes. But I like to keep things simple. So I buy premade seasoning by Backwoods, also on Amazon. I like this variety pack that comes with small envelopes of the cure that you also need.

Step 3: Follow the directions on your seasoning packet to mix together some seasoning, cure and water. Then pour that mixture into a bowl with your meat and mush together with your hands until well mixed together. The meat will be a little tacky.
Step 4: Spoon meat into the jerky gun that comes with the dehydrator. Screw the end cap on and give it 1-2 clicks until the meat just starts to come out.

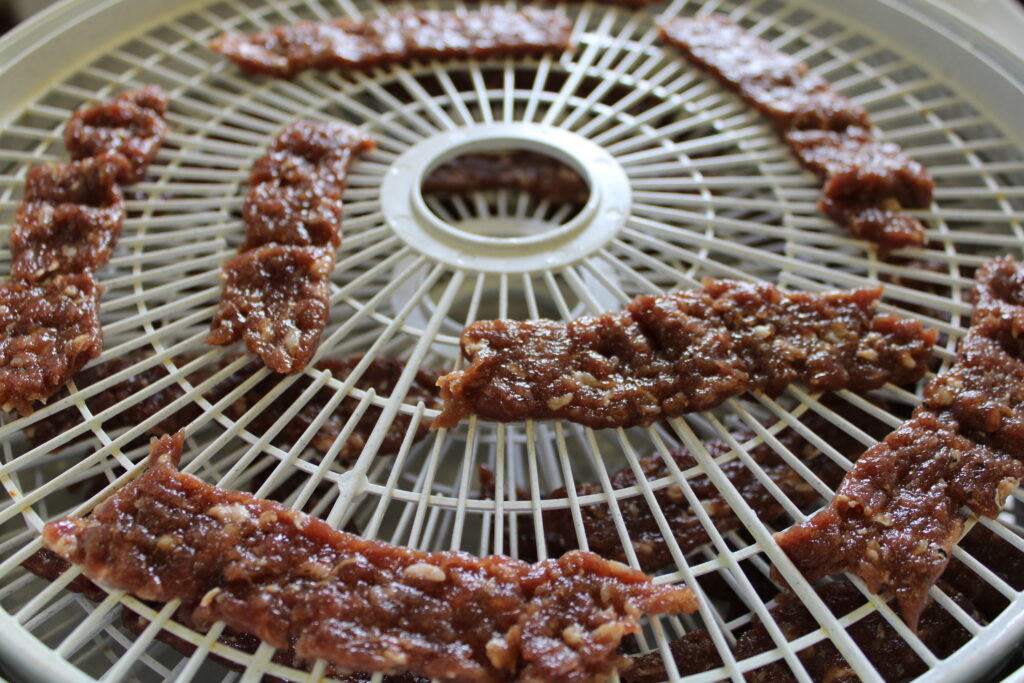
Step 5: Using the jerky gun, make ribbons of jerky about 4-6 inches long. You may need to use your finger or a spoon to get a clean break. Keep going until you use up all of the meat. Make sure to leave space in between ribbons. For one pound of meat, you will fill up approx. 4 trays, but always put all of your trays in the dehydrator, even the empty ones. I put the empty trays on top so that the top layer doesn’t get overdone by being right next to the heating unit.
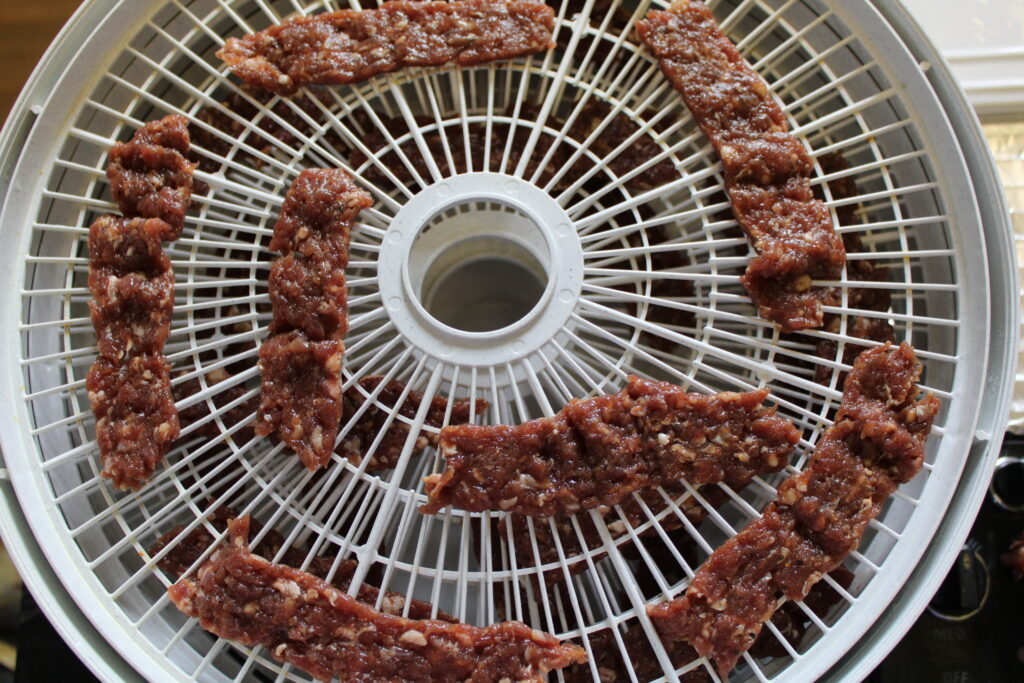
Step 6. Set the temp according to your dehydrator. Check on the jerky every hour or so. You can pat the jerky with a paper towel to soak up some of the grease. I rarely ever do that though. The jerky will dry for a couple hours, it really depends on how much you are making and how you spaced them apart on the trays. Follows the guidelines of your dehydrator, but a good rule of thumb is a couple hours and check on them once in awhile. If the jerky is underdone you could get sick and it will mold. If the jerky gets overdone, you will know it, the jerky will be too hard to chew.
Step 7. When the jerky is done, take it out, let it air cool on a paper towel, then you can store it in a mason jar, Tupperware container or plastic bag.
You can add some homemade jerky or dried fruit to our trail mix recipe.
Have you ever made homemade jerky before? Leave a comment below with your tips on how to make the best jerky.

Shop this post: